Making a Pokédex Toy
October 10, 2022My boys are obsessed with Pokémon and as a dutiful geek dad, of course, I have to support this obsession.
So naturally, when they recently asked me to build them a Pokédex toy, I considered this a welcome opportunity to spend some time, 3D printing and tinkering with electronics.
In case you are wondering what a Pokédex is, get the full explanation here.
But in a nutshell: it is a handheld device that contains information about Pokémon.
Parts List
This is what I used for making the Pokédex toy:
- 3D-printed case.
- Arduino Uno: I used an Uno because it was easiest to use with the display shield. Using a smaller device (e.g. Arduino Nano) would have saved a lot of space. However, I would have had to do all the wiring manually instead of just plugging in the shield.
- TFT LCD display: A few years ago I had bought a couple of these 2,4 Zoll TFT LCD Touch Display Shield, so I used what I already had. This shield also comes with a Micro SD card slot.
- Micro SD card to hold the Pokémon pictures.
- A LiPo battery (1600 mAh) that I reused from a broken RC car toy.
- A charging circuit that also acts as a 5V step-up converter for the LiPo.
- Push button.
- On/Off switch.
- Plastic screws and wires.
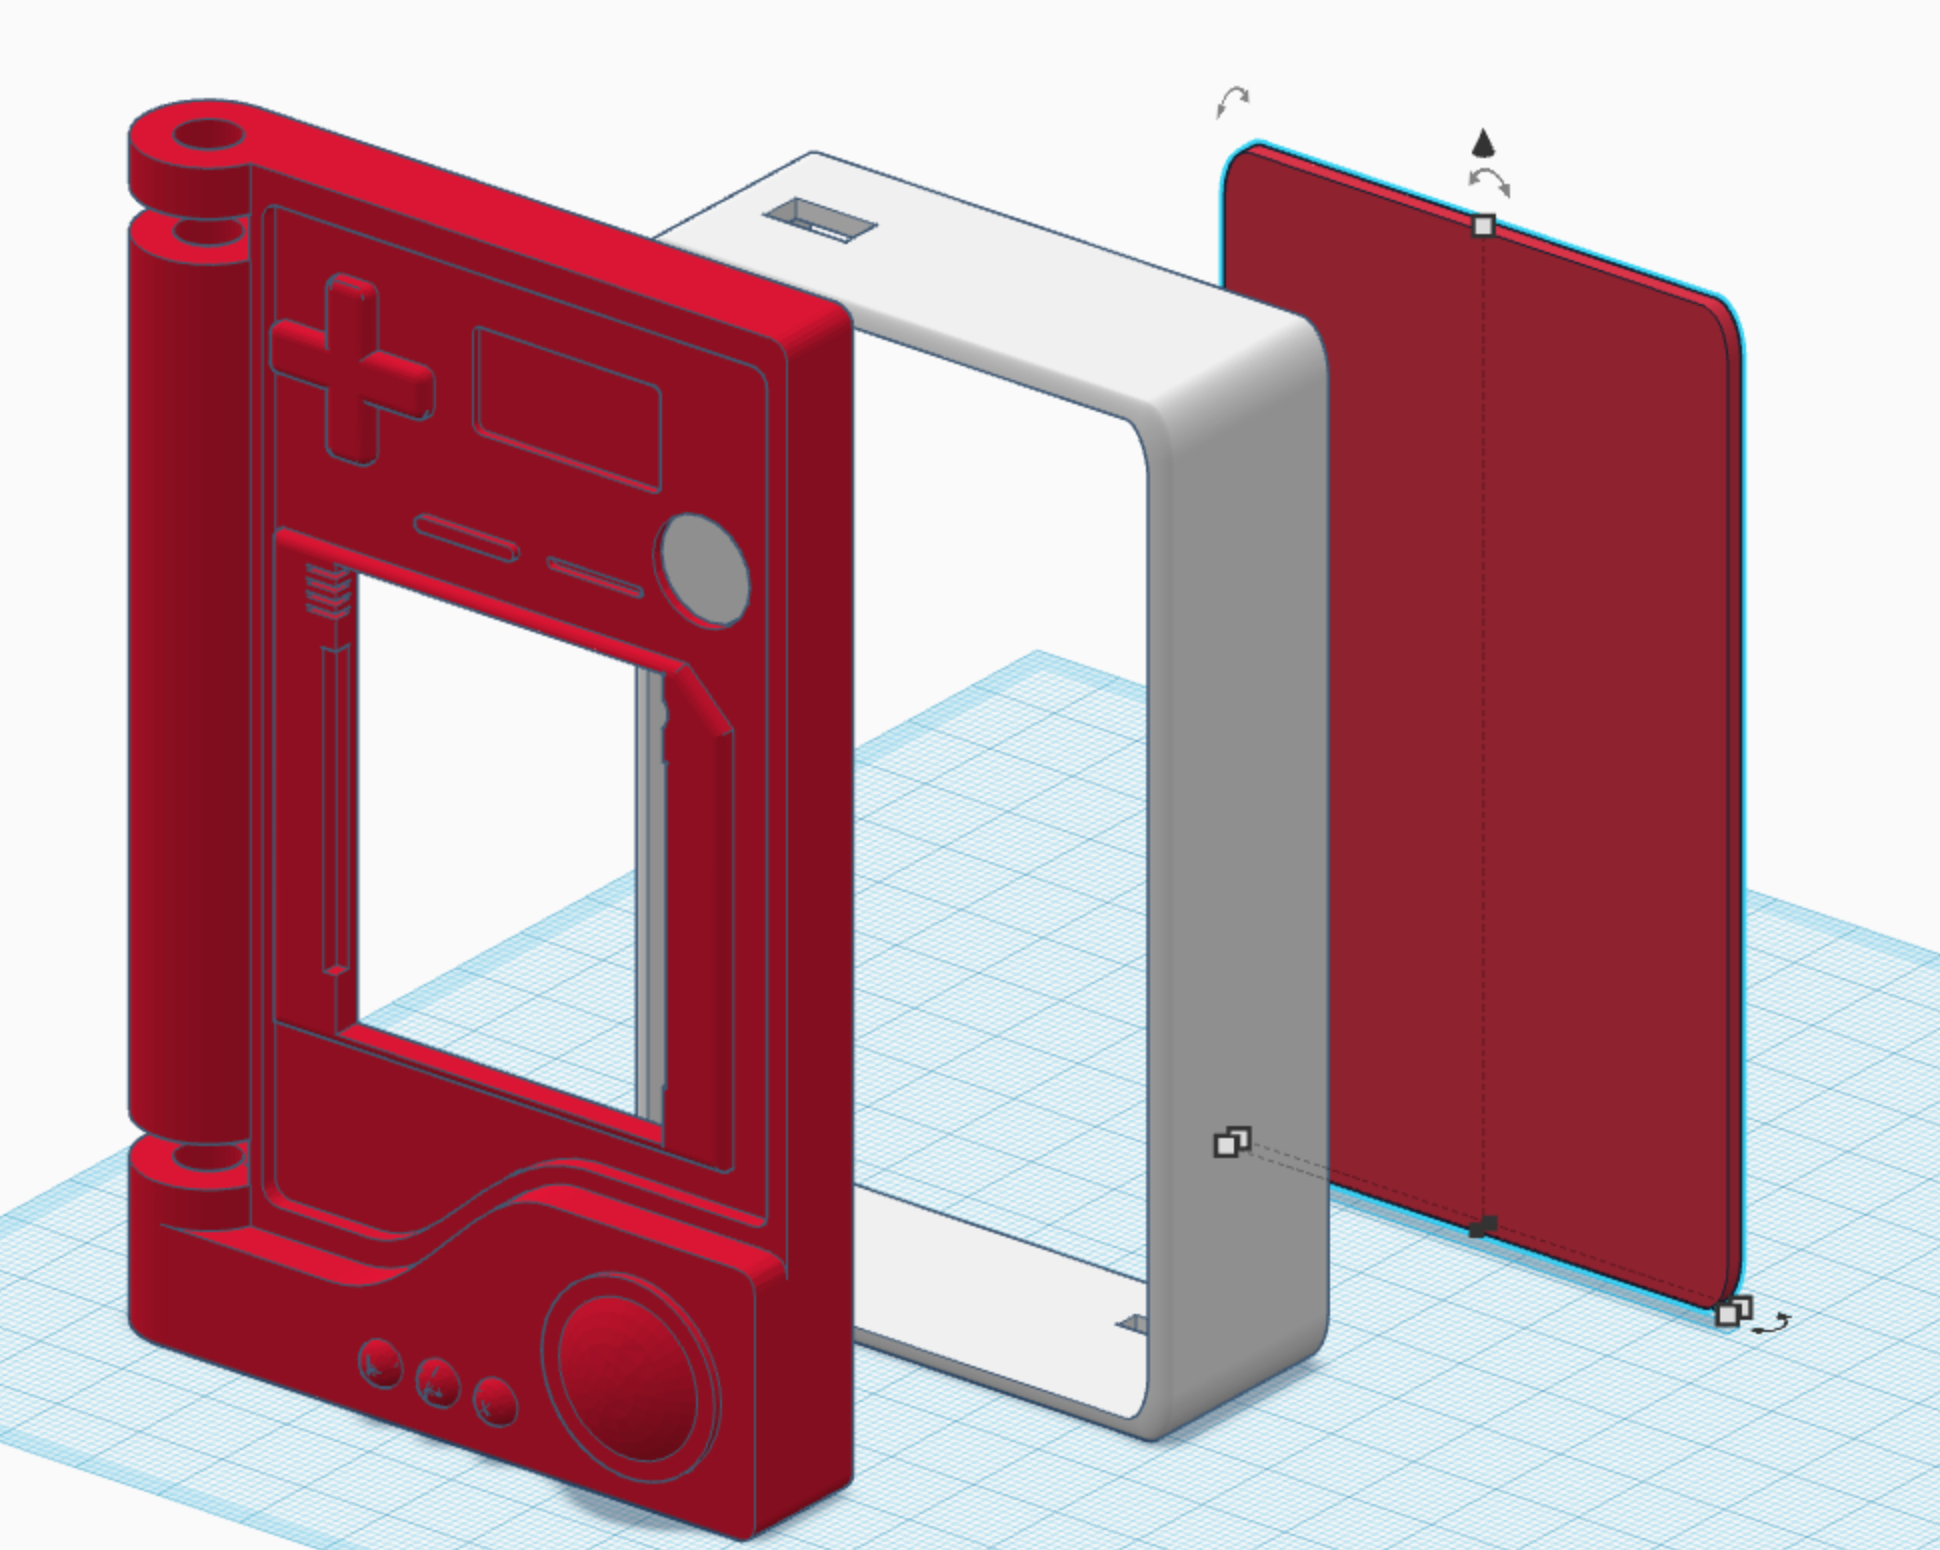
The 3D Model
As so often when starting a new project, I went and looked for prior art on Thinigiverse. And, of course, I found something.
As mentioned above, my plan was to add electronics (an Arduino-driven display) and make this toy actually interactive. So I had a make a few adaptions to this model to make space for for the additional parts.
You can find these adaptations here.
The Display
When I tried the display for the first time, the Adafruit TCTLCD Library simply would not work.
Fortunately, I remembered a previous project where I had
used the same display hardware. Looking up the code of this project, I remembered that I had used a
library called MCUFRIEND_kbv back then.
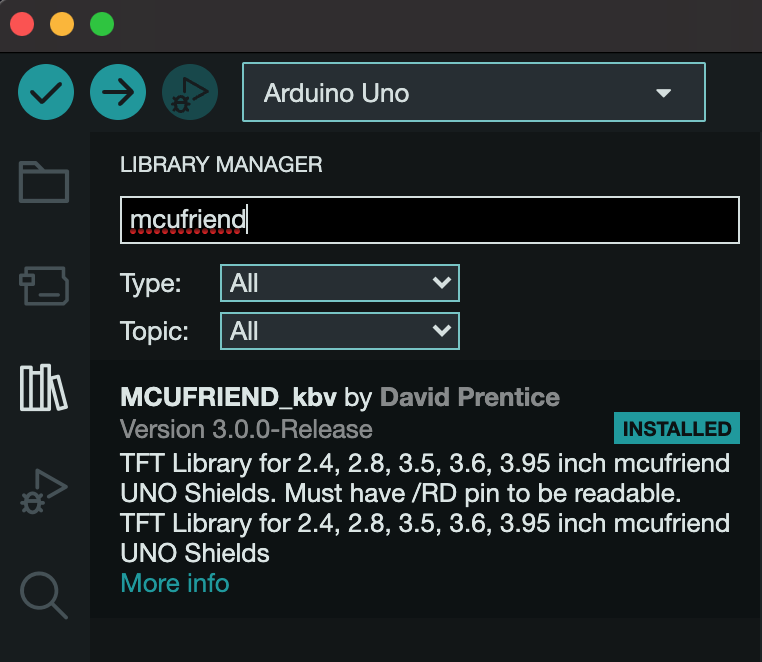
So I quickly installed this library in my Arduino IDE, the display was working as expected and I would be able to display Pokémon images.
The Input Button
Since the display shield is occupying most of the Arduino's pins already, I was planning for minimal interaction anyway.
The idea was to only have a single push button that would randomly flip through the collection of Pokémon images on the SD card.
The only pins unused (rather: visible not connected) by the shield were SDA and SCL.
These are electrically identical to the A4/A5 pins as I found out here.
So I simply tried whether could detect a button-press on A5/SCL which worked out fine.
pinMode(A5, INPUT);
val = digitalRead(A5);
Note: I could be that the touchscreen functionality is using these pins. But I did not intend on using the touchscreen anyway, so I did not care.
Preparing the SD Card (Pokemon Pictures)
Perfect! So I had a way to display images on the display, use a button to cycle through them. Now I only needed to prepare these actual images on the SD card.
Luckily, there is Pokémon Web API that provides images in all kinds of sizes for more than 1000(!) Pokémon.
Even better, the whole data is available on GitHub.
So, with the help of ImageMagick and some scripting I was able to:
- Convert all Pokékom images into the bmp format.
- Resize them to the required resoluton of 320x240.
- Rotate them by 90° so the orientation would be correct on the actual device.
# Convert all pngs to bmps
mogrify -format bmp *.png
# Create directory "bmps" and move new bmp files into it
mkdir bmps
mv *.bmp ./bmps
# Rotate all bmps 90° counter-clockwise
cd bmps
mogrify -rotate 270 *.bmp
mkdir resized
mogrify -resize 320x240 -quality 100 -path ./resized *.bmp
mogrify -extent 320x240 -gravity Center -fill white ./resized/*.bmp
Then I made sure to rename them by using a continuous scheme, so I could easily pick them at random in the final Arduino sketch.
c=1
for f in *.bmp; do
  mv -v "$f" "pok$c.bmp"
  c=$(($c+1))
done
If I ever update the files on the SD card, I also need to touch this line ...
#define NR_OF_POKEMON 1099
... which allows me to quickly pick a random image like this:
...
auto id = random(NR_OF_POKEMON) + 1;
String name = String("/pok") + id + ".bmp";
loadImage(name);
...
Assembling the Pokédex
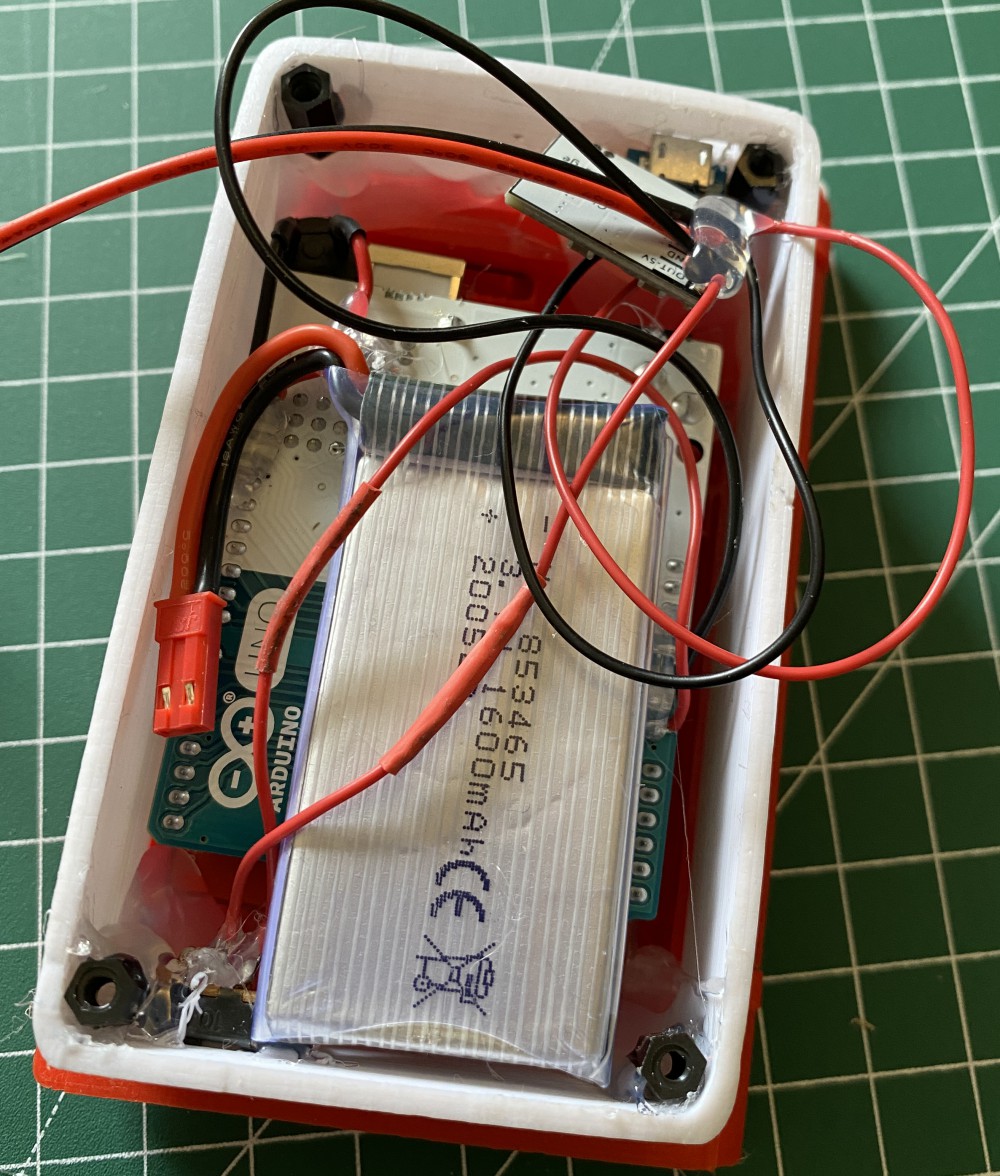
With the "firmware" ready and the parts at hand, I only needed to assemble everything.
First, I glued in the button and the display attached to the Arduino Uno.
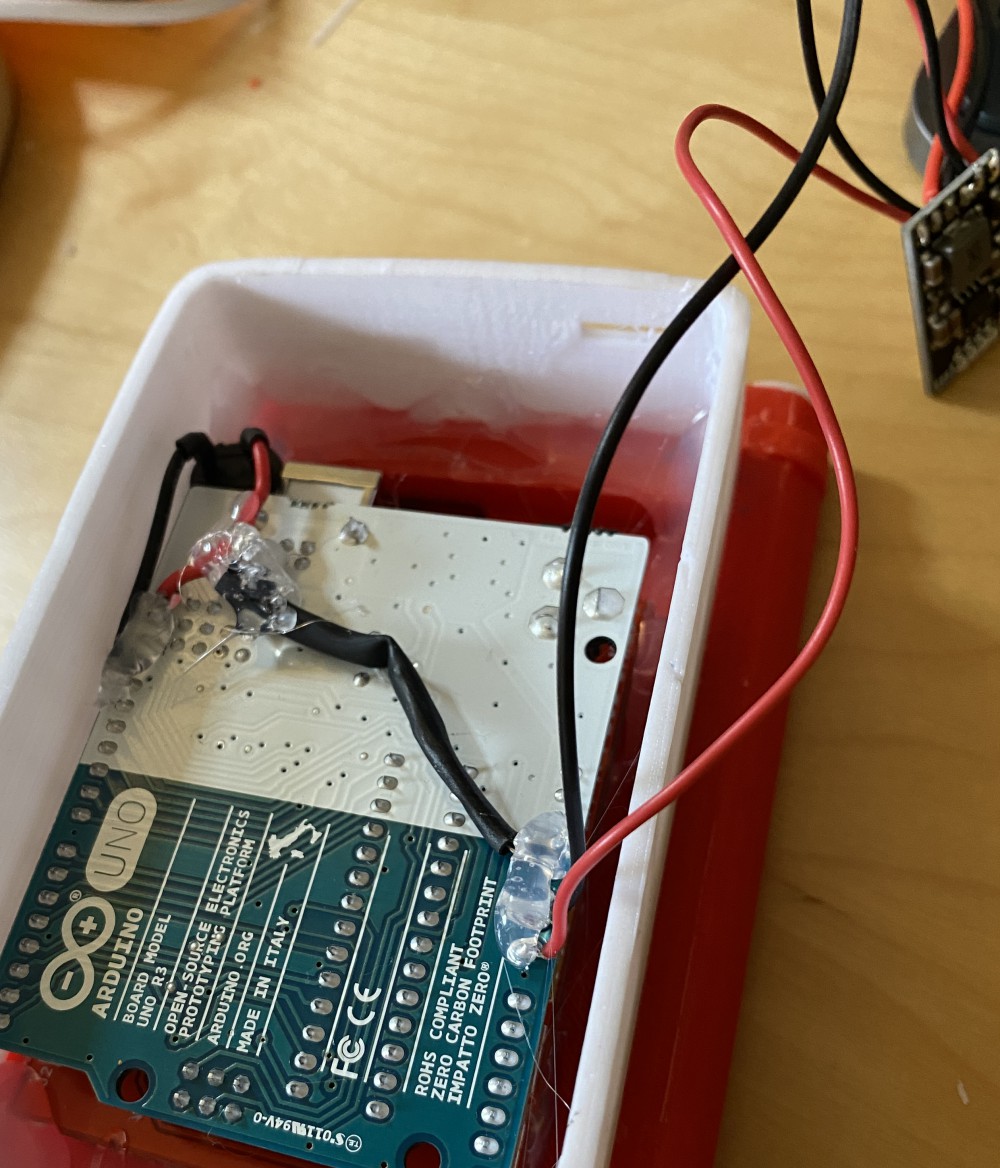
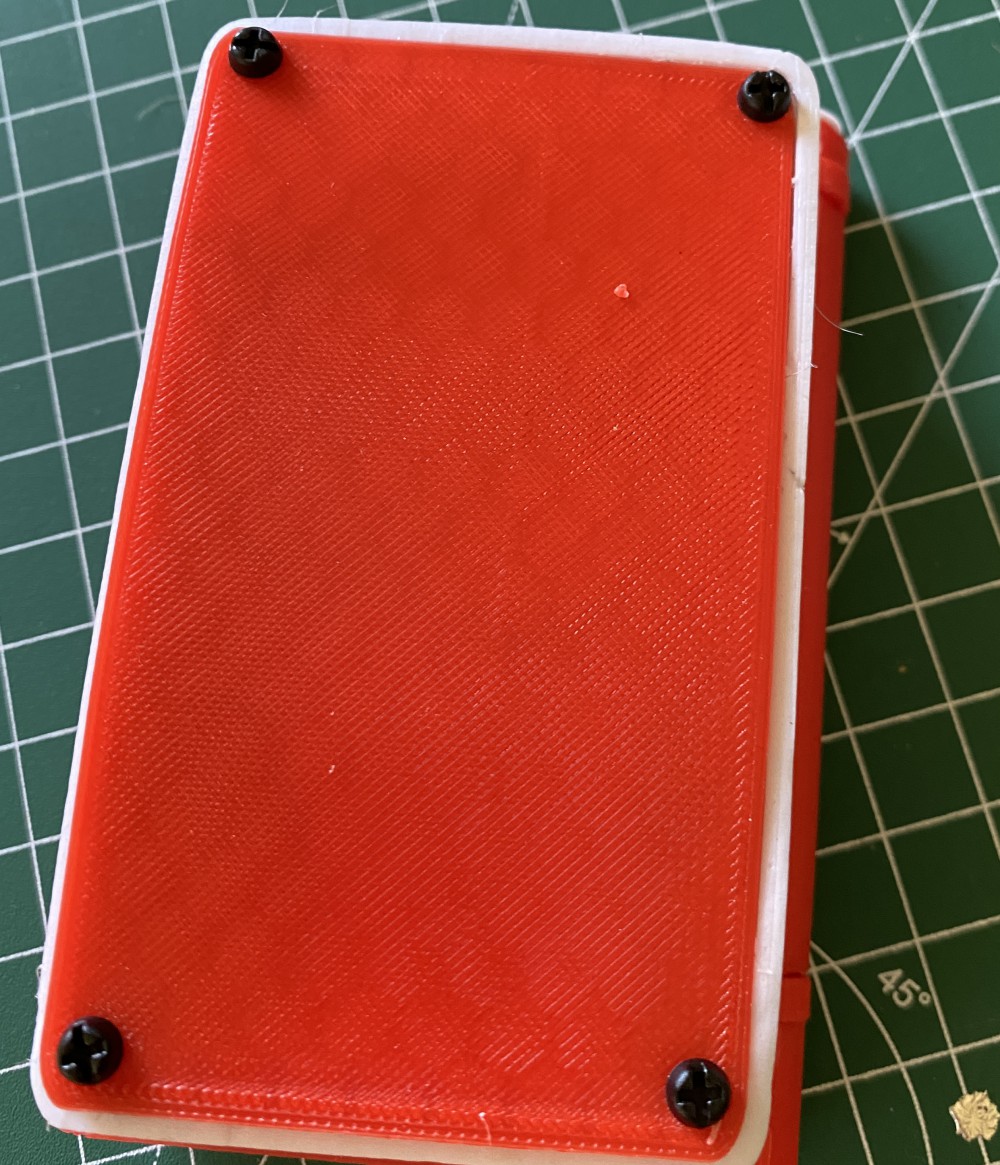
Next, I connected the charging circuit and the battery. I also glued in sockets for the plastic screws that would hold the back cover.
And closing it up.
The "boot screen".
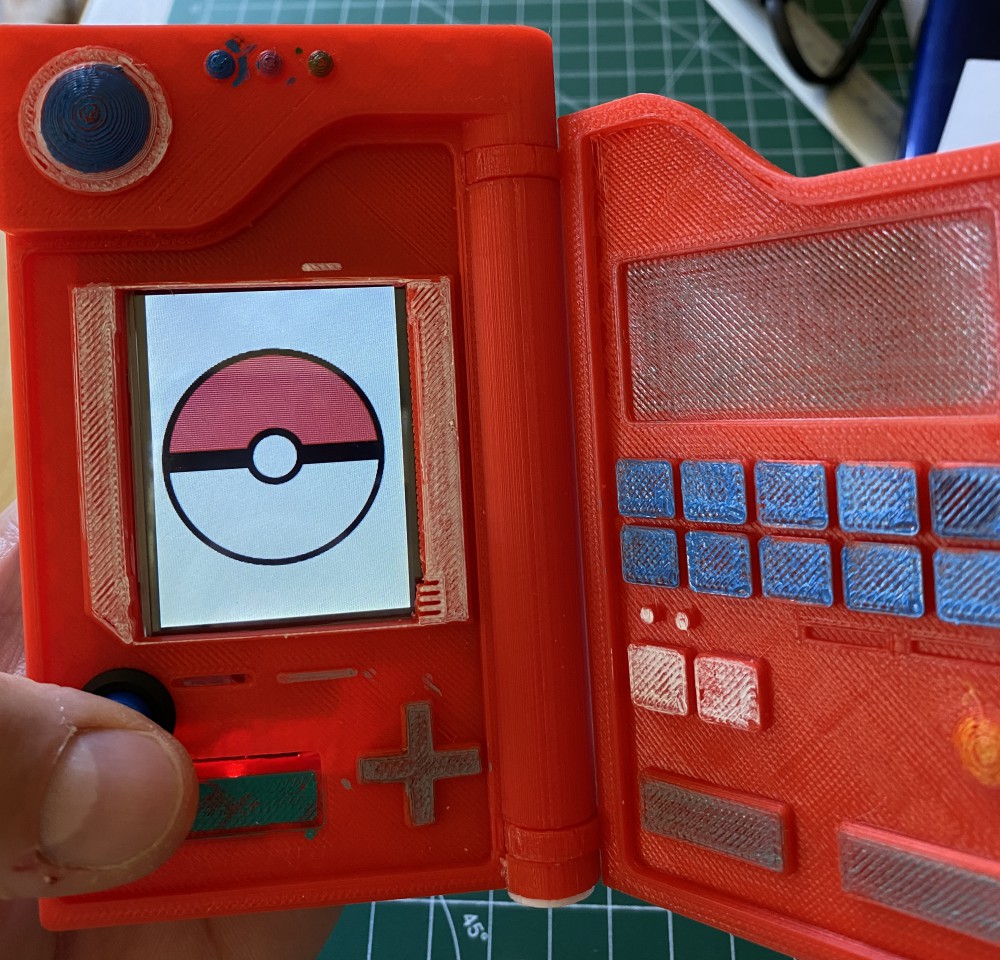
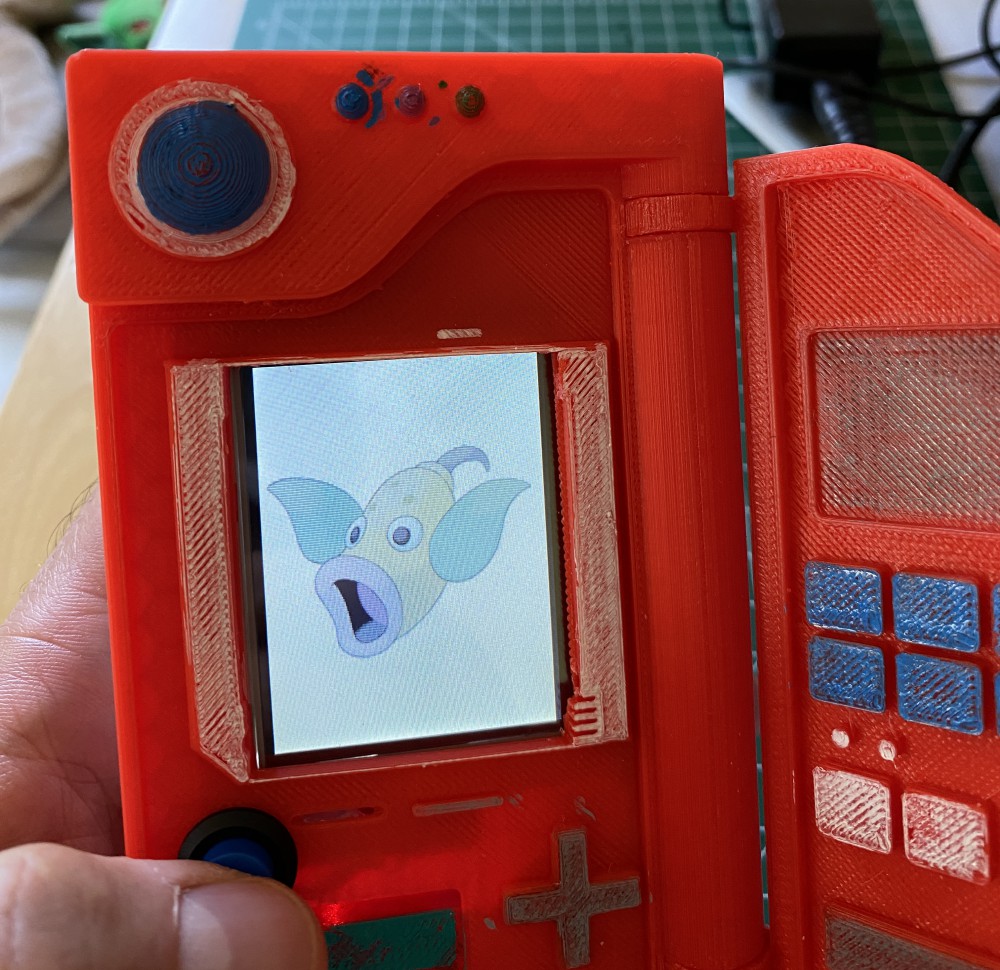
The Pokédex displaying a Weepinbell.