Integrating a Custom LED Device into Home Assistant
August 19, 2022TL;DR: In this project I integrated a custom LED lamp into Home Assistant using the Custom Light Output template for ESPHome.
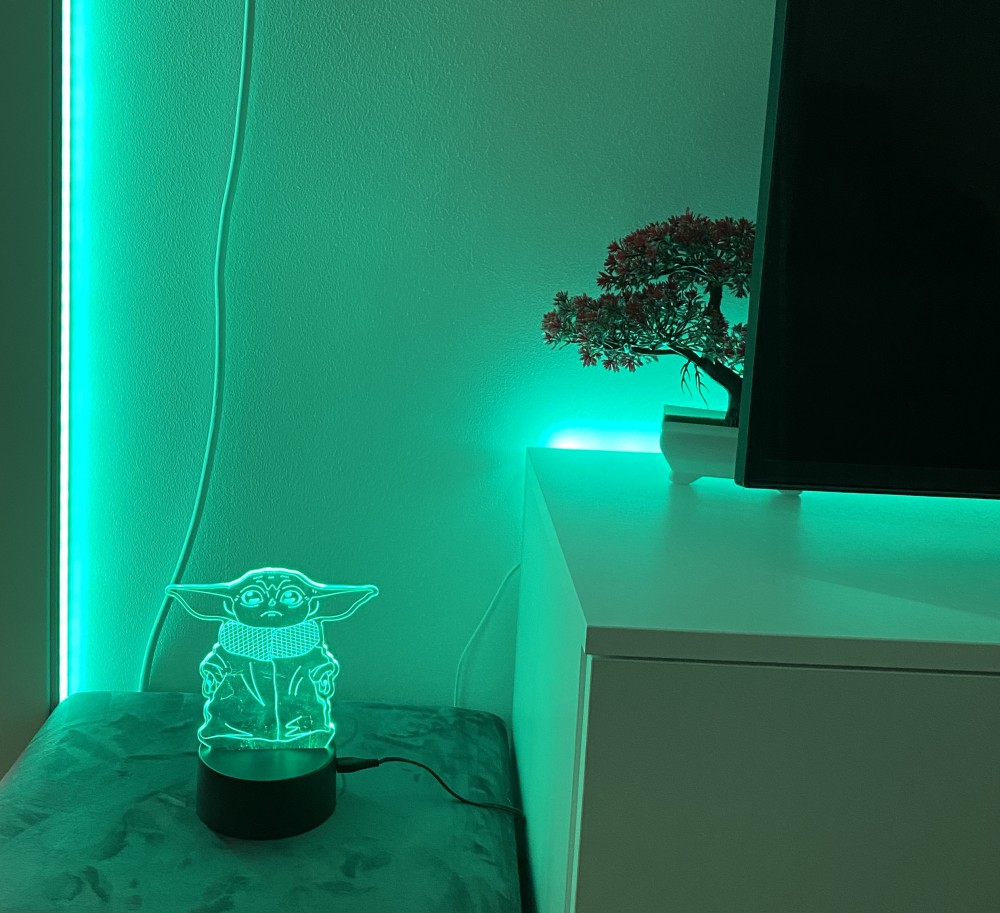
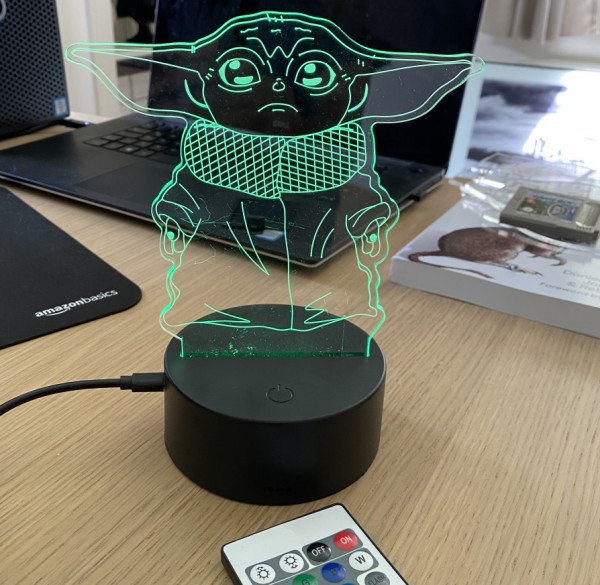
I recently wrote about modding this Stars Wars LED device so that I could control it with an Arduino instead of the IR remote it came with originally.
Home Assistant Integration
The next step was integrating this LED device into my Home Assistant installation, so that it would be turned on and off together with a few other devices I already had programmed routines for.
Adding WIFI
The first prerequisite was adding WIFI to this LED device so that it could actually be controlled remotely via Home Assistant. Luckily, there's is a whole slew of Arduino-compatible devices available that come with built-in WIFI. One of these devices that I had readily available, is the WeMos D1 Mini that's based on the popular ESP8266 microcontroller.
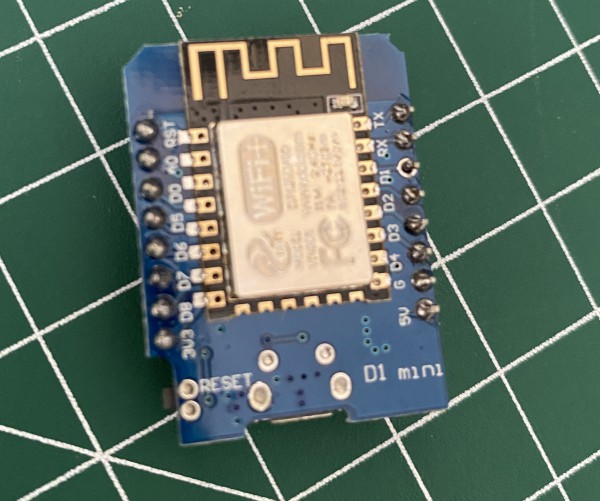
This board has a compact form factor which made it fit nicely into the LED's case.
ESPHome
The simplest way to integrate custom hardware into Home Assistant is via the ESPHome Add-on for Home Assistant. ESPHome brings a ton of new functionality to Home Assistant as long as the hardware is based on the ESP8266 or ESP32 microcontrollers (which is the case with the WeMos D1 Mini). The installation and configuration of ESPHome with Home Assistant is really straight-forward and well-documented.
Custom Light Output
While ESPHome brings a lot of built-in and out-of-the-box functionality for all kinds of sensors and devices, in this case a bit of custom code was required to integrate the custom LED device.
Fortunately, there is already a good template for integrating custom light output.
The example code snippet already provides everything I needed for my integration.
- The
setupmethod can be used to initialize the device. - The
get_traitsmethod lets the device report its capabilities (e.g. "RGB and brightness is supported"). With this information, Home Assistant knows what user interface to display (e.g. a color-wheel). - The
write_statemethod then receives the actual command. In my case that's the RGB color information so I knew what LED color to display.
#include "esphome.h"

class MyCustomLightOutput : public Component, public LightOutput {
 public:
  void setup() override {
    // This will be called by App.setup()
    pinMode(5, INPUT);
  }
  LightTraits get_traits() override {
    // return the traits this light supports
    auto traits = LightTraits();
    traits.set_supported_color_modes({ColorMode::RGB, ColorMode::BRIGHTNESS});
    return traits;
  }

  void write_state(LightState *state) override {
    // This will be called by the light to get a new state to be written.
    float red, green, blue;
    // use any of the provided current_values methods
    state->current_values_as_rgb(&red, &green, &blue);
    // Write red, green and blue to HW
    // ...
  }
};
The only small challenge in my case was to map the RGB colors to well-known color-commands represented by the buttons originally on the IR remote.
E.g. an incoming RGB value of 255, 0, 0 needs to be mapped to the RED command.
A simple table that maps commands to RGB values and a mapping function did the trick here.
uint8_t mapColor(int r, int g, int b)
{
  uint8_t cmd = 0;
  int minDiff = 10000000;
  for (int i = 0; i < sizeof(colorCommands) / sizeof(ColorCommand); i++)
  {
    auto diff =
      abs(r - colorCommands[i].R) +
      abs(g - colorCommands[i].G) +
      abs(b - colorCommands[i].B);
    if (diff < minDiff)
    {
      minDiff = diff;
      cmd = colorCommands[i].Code;
    }
  }
  return cmd;
}
The complete source code of this custom component together with the yaml definition for the Home Assistant integration can be found here.
Home Assistant
The only remaining thing to do is the actual Home Assistant integration.
Note: The easiest way to work with the Home Assistant configuration is using the Visual Studio Code Server Add-on.
Simply copying the .h and the . yaml files into the esphome folder of your Home Assistant installation
is all that needs to be done.
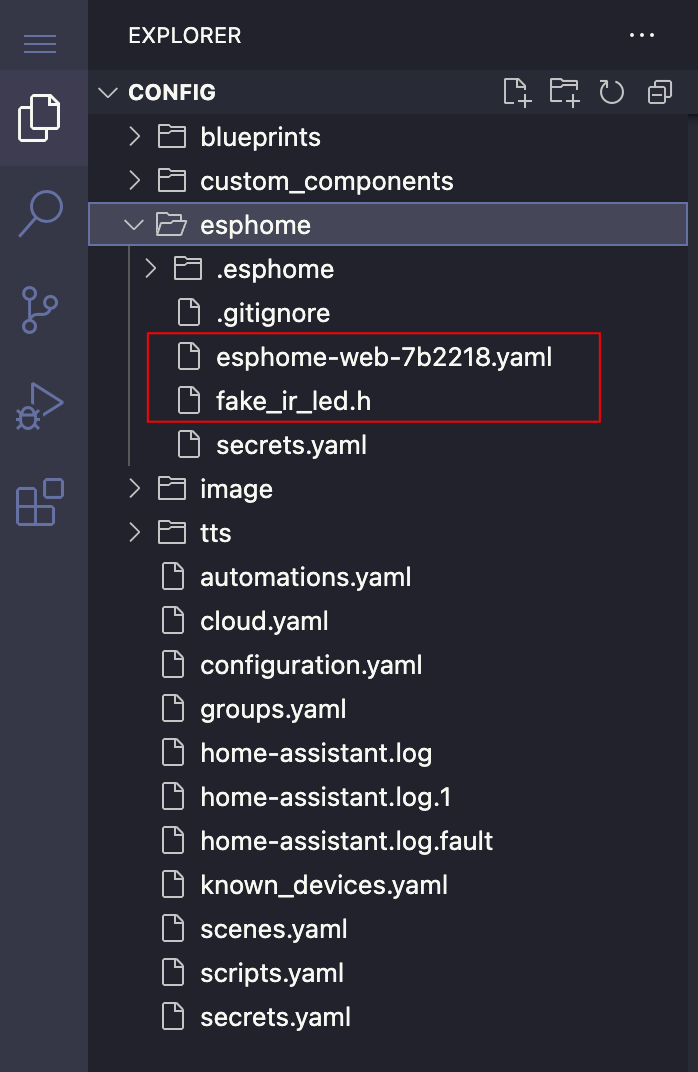
The new custom device will then automatically show up via the ESPHome integration.

Lights On!
I then added the new light device to an existing lights group called "Wohnzimmer LEDs" (that's German for "Living Room LEDs")
light:
  - platform: group
    name: Wohnzimmer LEDs
    entities:
      - light.tv_light_strip_couch
      - light.extended_color_light_8
      - light.fake_ir_led
The next time my pre-configured automation was turning this light group on, LED Yoda already took part in it 😆.